Depending on your skill level changing the transmission fluid and filter on your 4l60e may be easy or a challenge if it’s your first time. While it can get messy if you’re not careful, as long as you have the right tools and equipment dropping the pan and replacing the filter isn’t bad.
Tools needed to perform a fluid and filter change in your car truck include:
Parts needed:
- Transmission Fluid: Dexron III (Dex/Merc) or Dexron VI (Dex6) Note: you will need about 5 or 6 quarts of new fluid depending on which style transmission pan you have.
- Transmission Filter & Gasket Kit:
- Deep Pan filter kit (truck style, extra capacity pan)
- Shallow Pan filter kit (car style flat pan
- New Transmission Pan (Optional): Dorman 265-811 Deep Pan
- Transmission Fluid Funnel: 18 inch transmission funnel
How To Change 4l60e Transmission Fluid & Filter
Performing a basic drain and fill on your car or truck’s 4l60e transmission is a fairly straight forward process. As mentioned before, if this is your first time doing a fluid and filter change, you might have a tougher time, but take your time and be careful about dropping the pan, and you will be good to go without taking a transmission fluid bath.
This video does a great job of showing how to do a drain and fill transmission service on a 4l60e in a 2004 Chevy Silverado.
Step 1: Rise Vehicle With Ramps or Jack and Jack Stands
As always, when doing anything under a vehicle, safety is the #1 priority, so it is important that you can keep the vehicle high enough to work under it. The extreme majority of DIY car hobbyists don’t have their own 2 post lift, so we need to use ramps or a jack and jack stands and do things on our backs.
Once you get your car or truck on ramps or secured on jack stands, you can start to prep the area for the job. If you have a large cardboard box or something similar that you don’t mind getting transmission fluid on, then put that down under the transmission in addition to the pan that’ll be used to catch the old fluid when you drop the transmission pan.
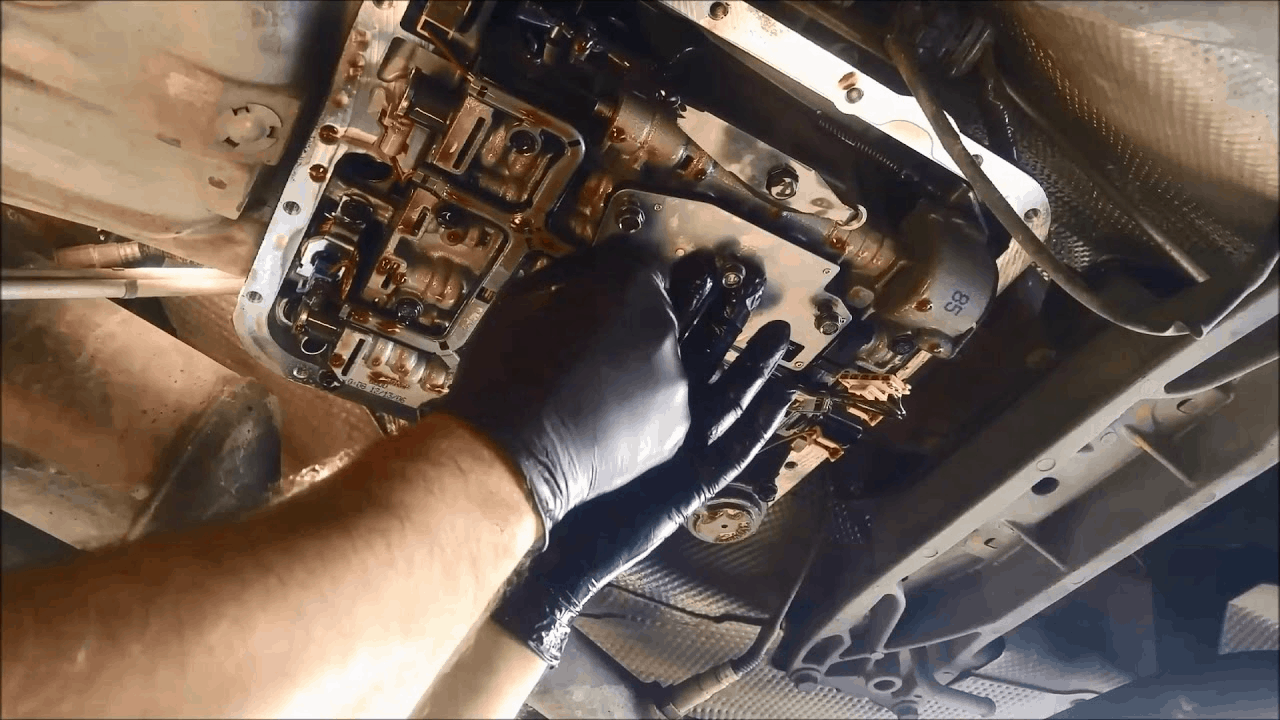
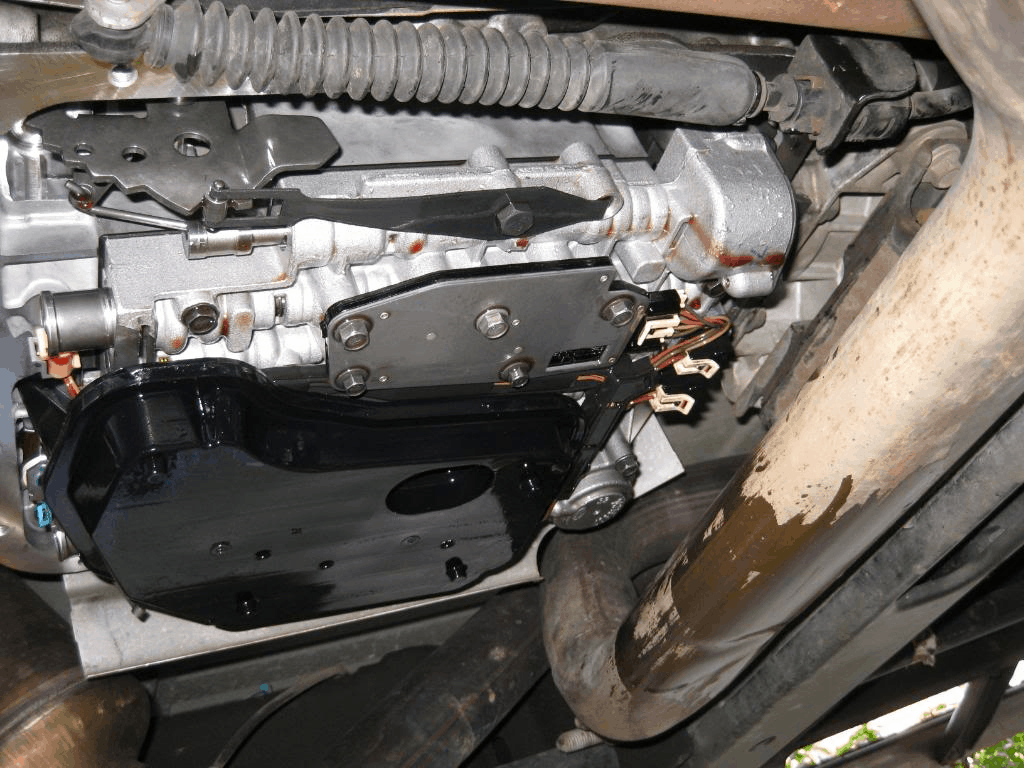
Step 2: Begin Removing Transmission Pan Bolts & Shifter Linkage
Once you’re under the vehicle, you’ll want to start removing the 16 13 mm bolts around the perimeter of the pan to begin draining the transmission fluid. Some cars or trucks may not have a transmission drain plug, which is very common on these transmissions. If you car or truck doesn’t have a drain plug, now would be the perfect time to buy and install one. We recommend the Dorman 216-811 which is a factory replacement deep pan with a built in drain pan.
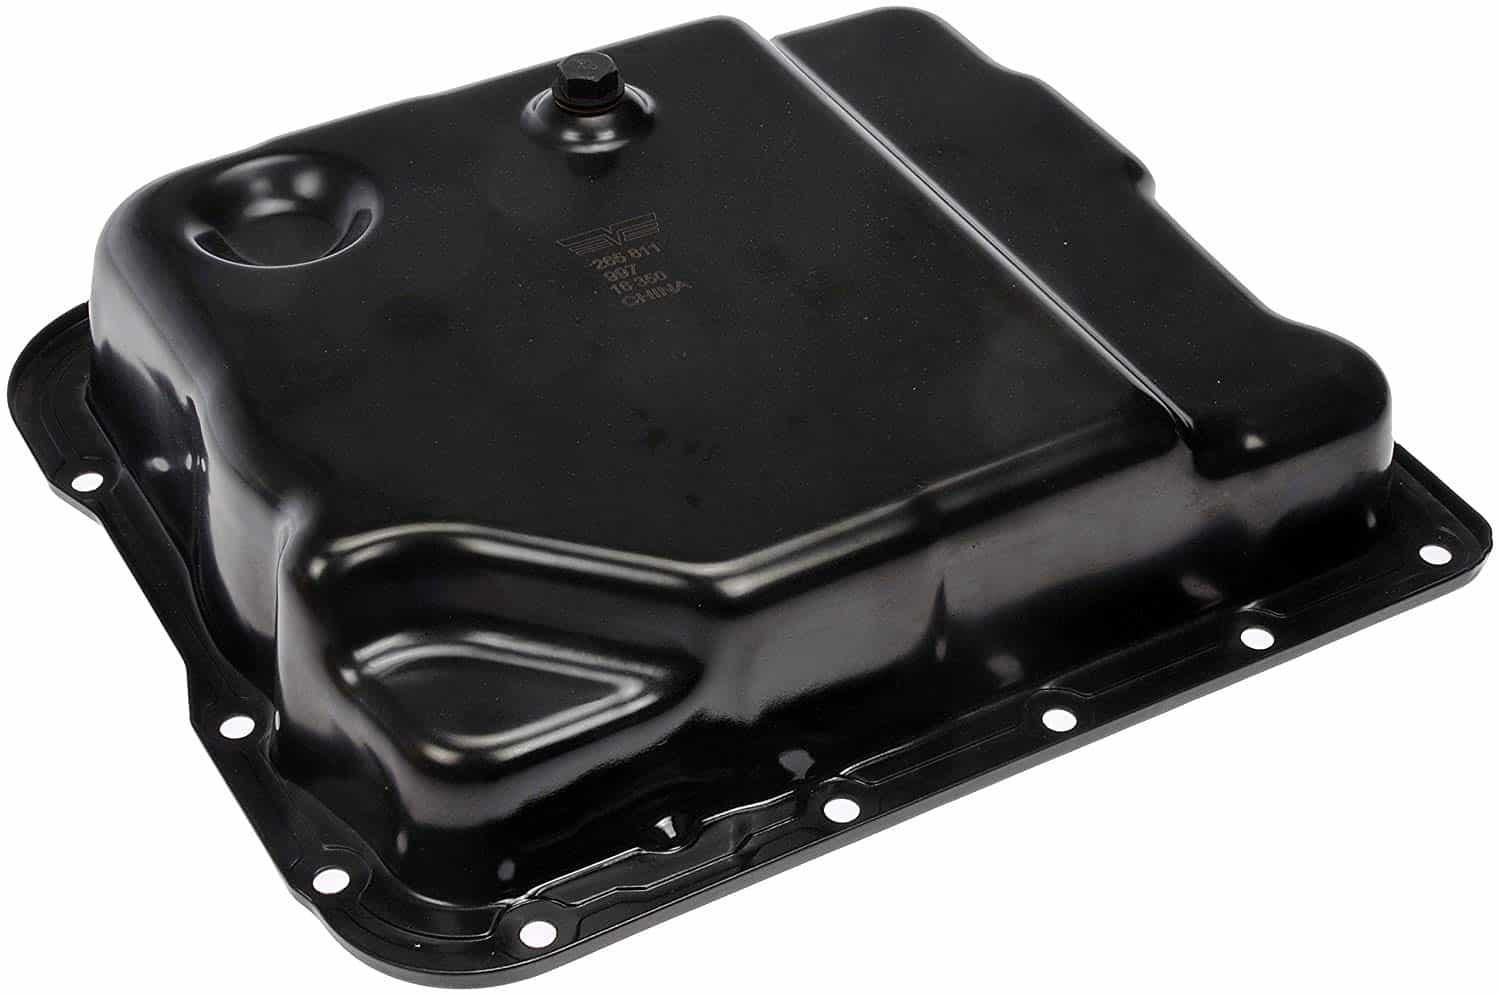
Click here to buy Dorman 265-811 transmission pan
Based on whichever pan your 4l60e has, you’re going to want to put your drain pan directly under the transmission to catch any fluid as you start to loosen the pan from the transmission.
It is usually best to start in the front and work your way back that way you can have the front of the Pan angled down to drain more fluid out of the front of the Pan depending on if you have a truck or car the truck pans are actually deeper in the front so that’s where you’d wanna begin draining 1st
Step 4: Lower Transmission Pan
Like mentioned before this could be tricky if your vehicle’s transmission pan does not have a built-in drain plug from the factory which most 4l60es don’t, so carefully lower the front of the pan to allow for the fluid inside to drain into into your drain pan.
Once the Pan is completely removed let the transmission drain for a few more minutes to get any residual fluid off of the valve body and transmission filter.
Step 5: Remove Transmission Filter
Once most of the fluid has stopped darning into your catch Pan you can now begin to remove the transmission filter to do this all you need to do is simply twist and pull down on it and it should come free.
Something to consider when pulling the transmission filter is that there is a seal inside the case of the transmission that the filter usually falls out of typically it is best to replace this but if you can get the new filter in place and it seals correctly that many people typically leave it in since it could be a real pain to remove.
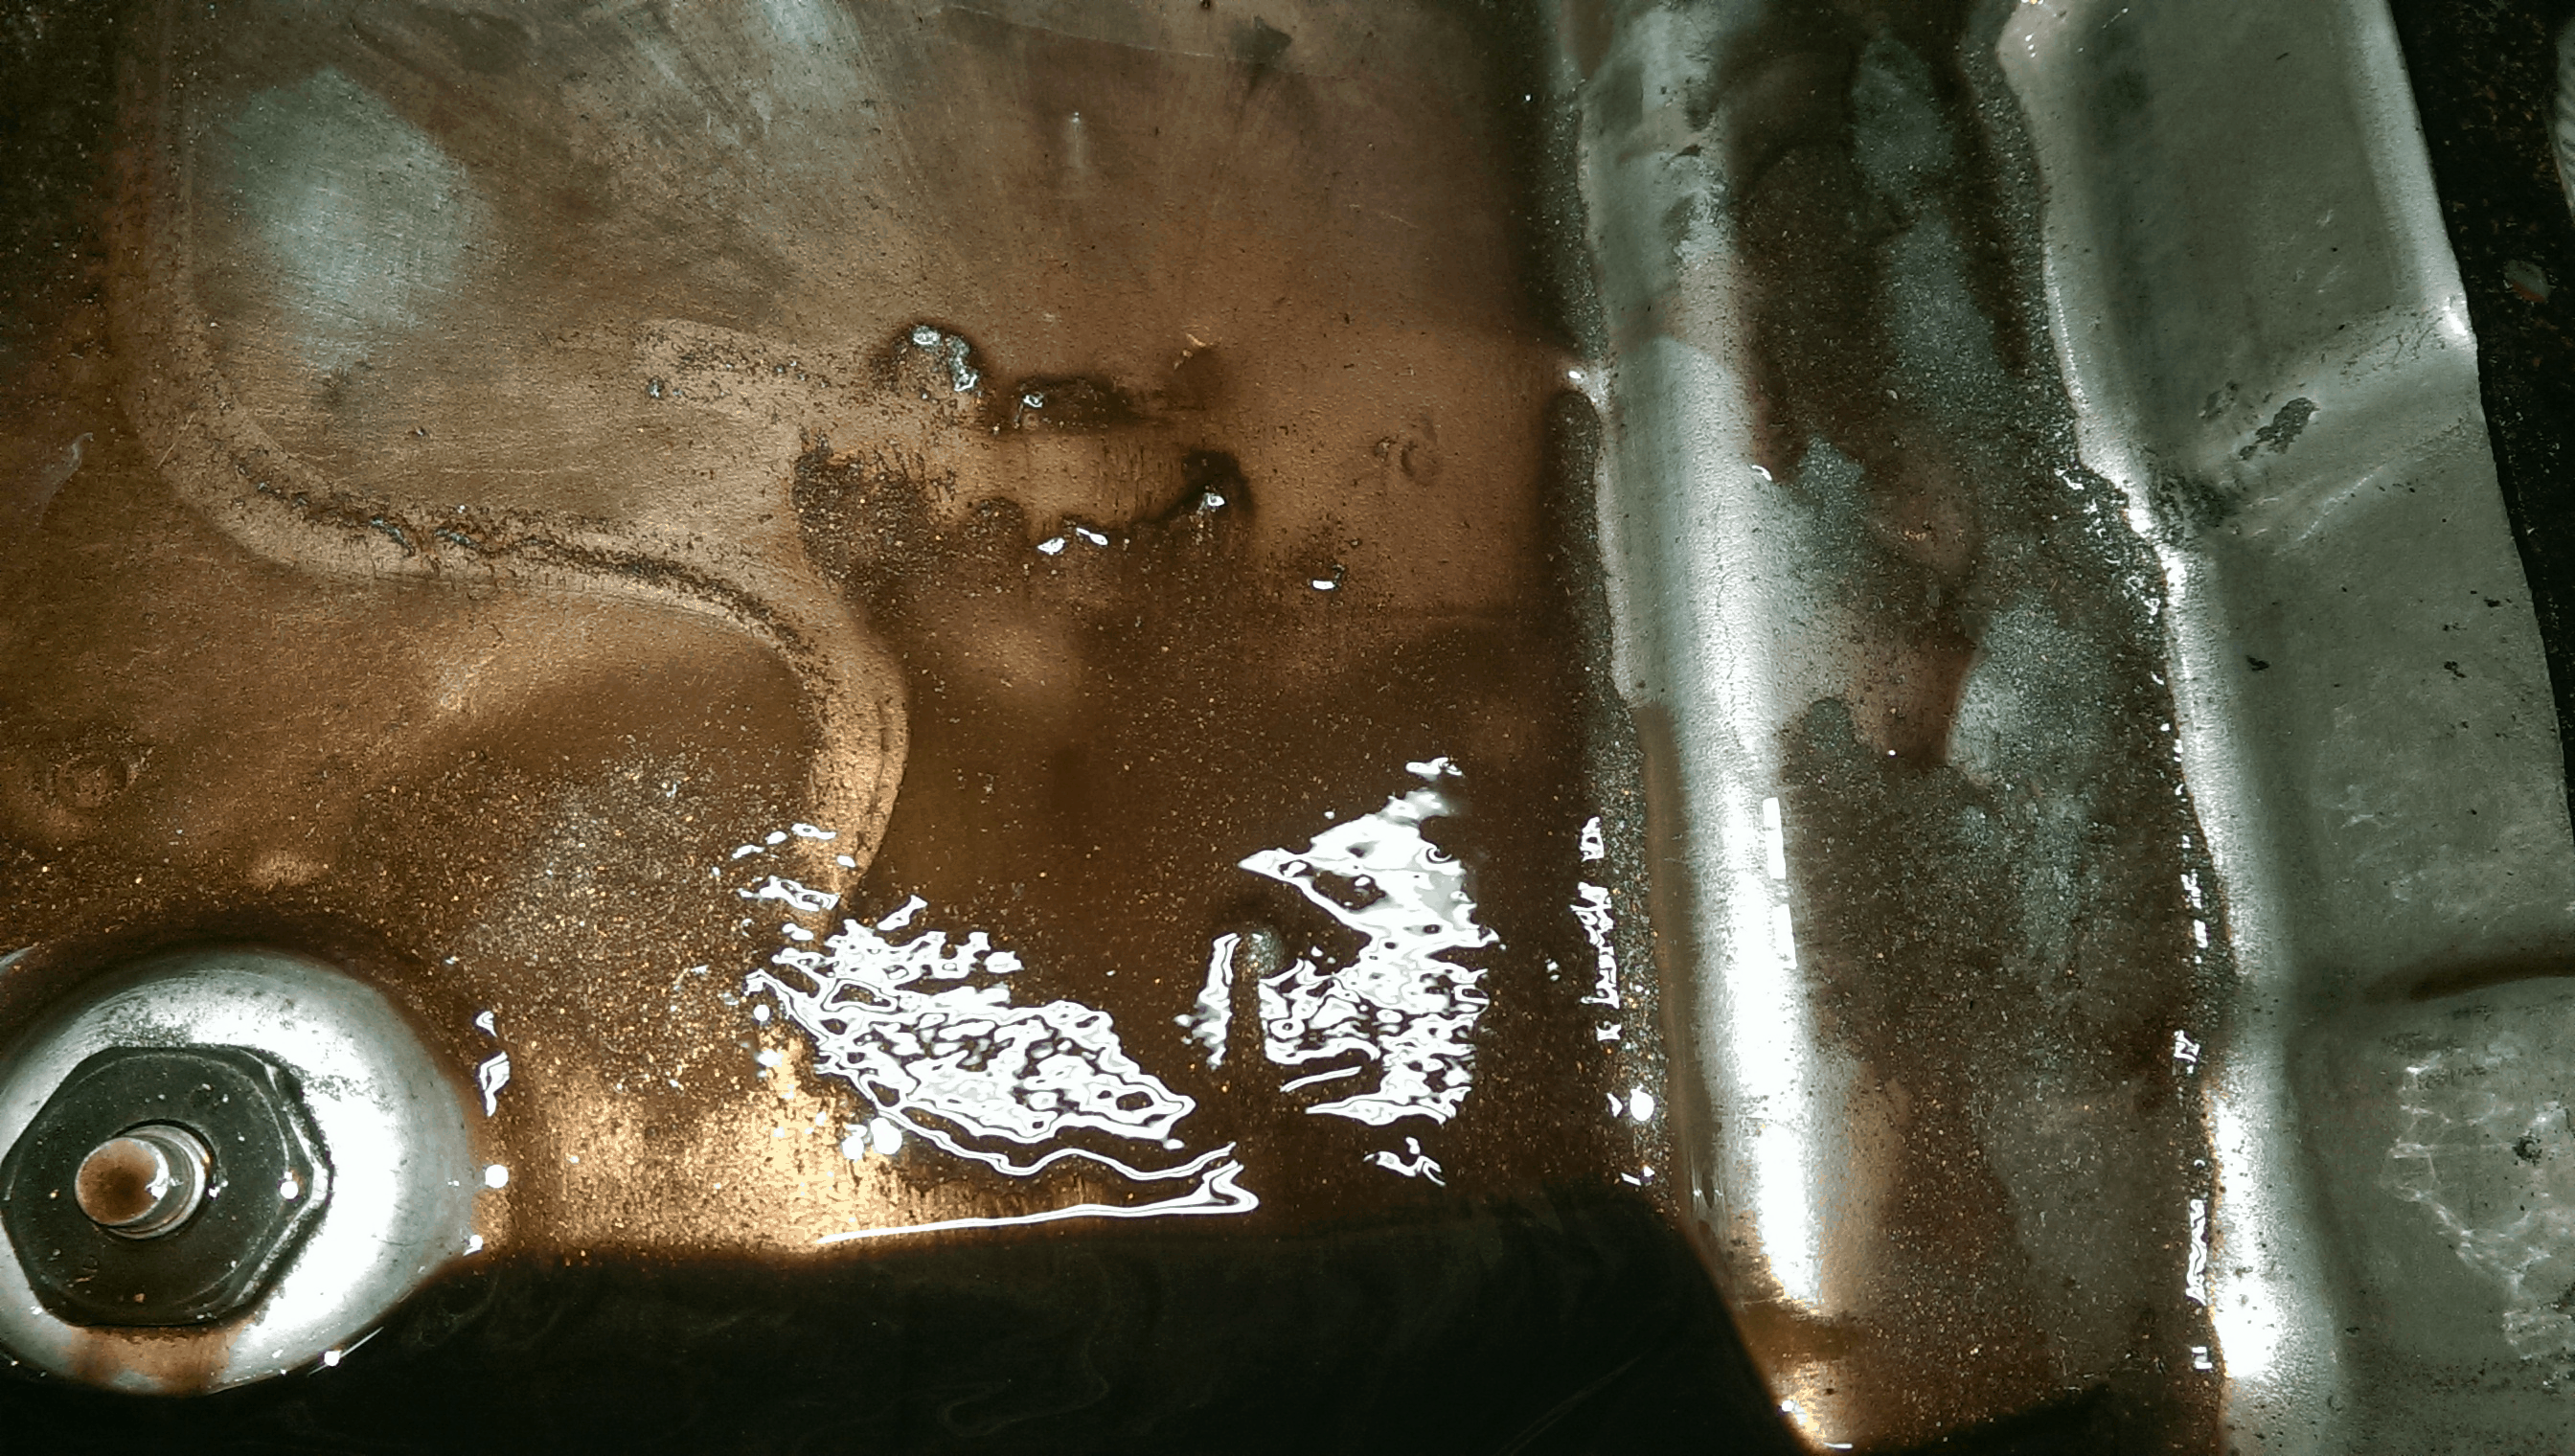
Step 6: Pan Inspection
Now once everything is apart and the fluid has all drained out, it’s time to Install everything back into the transmission such as the filter and pan and gasket. Before putting the filter and pan back on, the inside of the pan and the magnet need to be cleaned.
If your transmission works as it should, don’t be alarmed if the magnet is dirty. If you notice that the pan look very metallic and there are metal chunks on the magnet, then you might have bigger issues at hand. Here is what you hope to not see inside of your transmission pan.
Step 7: Reinstallation
Once you determine that your transmission pan has nothing questionable and is all cleaned, it’s time to put it all back together. Like mentioned before, there is a seal inside the case for the filter. Truthfully, if you can get it out, great, but they are sometimes a real pain to remove. It’s not uncommon for people to put the new transmission filter in with the old seal if it still holds the pan nice and tight.
4l60e Transmission Pan Torque Specs & Sequence
When tightening the transmission pan bolts, be sure to install bolts in a criss-cross or star pattern from one side to the other to prevent over tightening on one side of the pan. GM recommends that 4l60e transmission pan bolts be torqued to 97 in-lbs, so not overly tight at all. Since the case of the transmission is aluminum, it’s easy to overtighten and strip out the treads.
Add Fluid and Check Levels
Once everything is back together and the pan bolts are torqued to spec, we can now put fluid back into the transmission. If you are have a “shallow” pan, you will most likely take 4-5 quarts, whereas a deep pan will take 5-6 quarts. Start by putting in 3 or 4 quarts first then start the vehicle. You should notice some transmission fluid on the dipstick. If not, add another quart or so until you begin to see fluid on the dipstick.
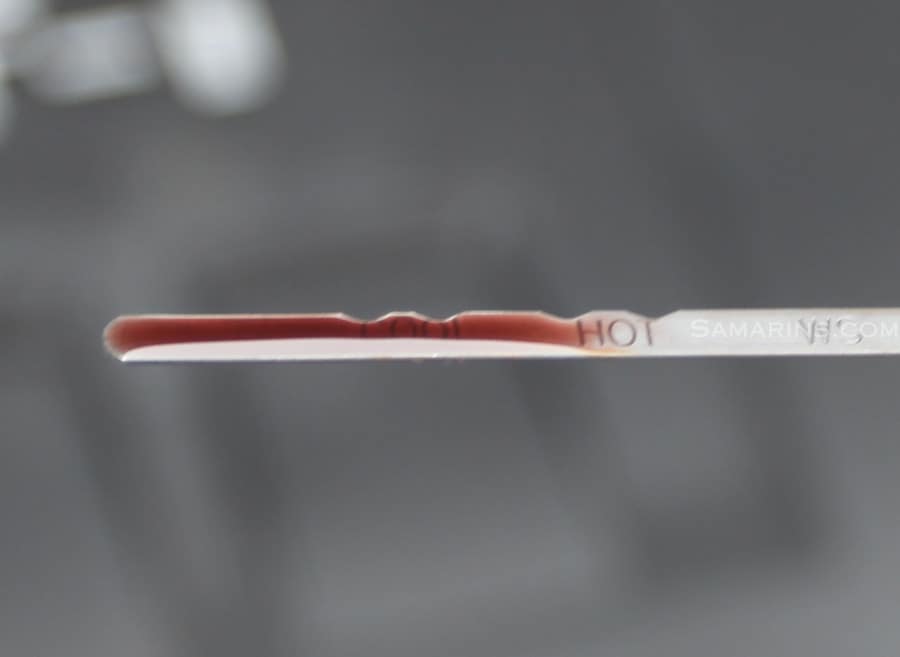
All transmission dipsticks have a hot and cold level indicator that tells you where your fluid level is. Once you start seeing fluid on the dipstick, get in the vehicle and run through the gears a few times to get the fluid flowing through the system, then check the level again.
If the level appears to be in the correct range, go for a quick drive to get some heat in the fluid. When transmission fluid get warm, the level in the pan starts to change, so it’s always best to check transmission fluid when the vehicle is warm, in park, and on level ground.
How Many Quarts of Trans Fluid Does A 4l60e Take During A Filter Change?
Depending on the style of transmission pan you have, in most cases, a 4l60e takes 5 – 6 quarts of transmission fluid when doing a standard fluid and filter change when dropping the pan. It’s always best to add fluid and check levels a couple of time to ensure that fluid levels are correct.
How Often To Change 4l60e Transmission Fluid
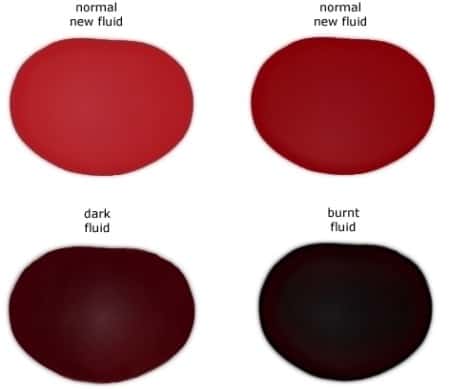
It’s recommended to replace transmission fluid every 30-50,000 miles depending on use and transmission condition. If you have a truck that tows, an SUV that sits in constant stop and go traffic that gets hot, or a car you race (on a track of course), then you should consider changing the fluid every 30,000 miles based on it being exposed to more stress and heat. Again, the transmission fluid will tell you when it should be replaced.
The chart below shows different colors of transmission fluid based on their condition. Healthy transmission fluid is red or pink and will get more brown as it breaks down and wears out over time.