When your 4l60e starts to act up and not shift correctly, one very likely culprit is the shift solenoids. There are 2 shift solenoids in a 4l60e (1-2 and 2-3), and both control up and downshifts with fluid passing through them when commanded to do so by the computer.
However, when they go bad, you will notice very quickly. Your transmission will display a variety of symptoms, but sometimes these issues can be confused by other common 4l60e issues.
Luckily, it is pretty straight forward testing and replacing (if need be) 4l60e shift solenoids. In addition to that, if you discover the shift solenoids are the culprit of your issues, they are inexpensive to purchase and repair yourself if you have the skills and understanding of how to do so.
Symptoms Of Bad 4l60e Shift Solenoids
When assessing a shift solenoid issue, there can be a number of things to consider. While 4l60e shift solenoids do go bad, it’s not a common occurrence. Common issues that may cause you to believe the 1-2 or 2-3 shift solenoids are failing are a bad accumulator, stuck shift valve, just to name a few. The best way to make sure that your shift solenoids are the root cause is to test them.
Common shift solenoid failure or symptoms of a bad shift solenoid include:
- Failure To Down Shift – If a shift solenoid isn’t downshifting from one gear to another, you may be facing an issue of a shift solenoid being stuck open or closed. When the computer commands a downshift, fluid is routed through the solenoids, so if a solenoid is stuck, it is not able to effectively move transmission fluid which results in the transmission staying in the same gear.
- Transmission Won’t Shift Out Of Neutral – When a shift solenoid fails, the transmission won’t be able to shift into any gear. This gives the infamous “6 neutrals” that the 4l60e sometimes gets.
- Delayed or Inconsistent Shifts – If your shift solenoids are failing, you may quickly notice that the transmission will start to shift in a very inconsistent and delayed manner. Another thing that might happen is that the transmission will try to hunt or find the correct gear to be in. The computer is telling the transmission to do one thing, but mechanically it’s doing its own thing in regards to gear selection.
4l60e Shift Solenoid Locations
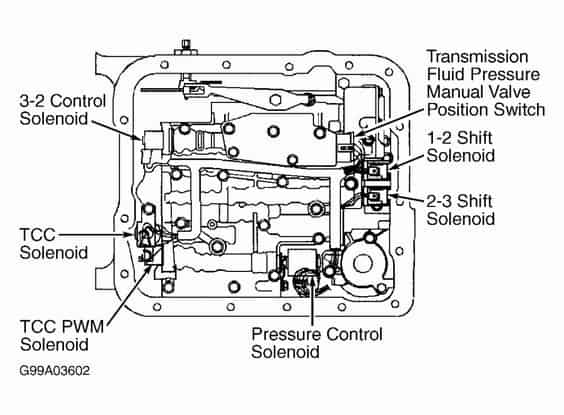
On a 4l60e, the shift solenoids are located on the rearward end of the transmission against where the pan bolts to the case. The image below shows how easily accessible the shift solenoids are once the pan and filter are removed. If you need to replace your shift solenoids, they are a pretty straightforward piece to remove and install.

How To Test Shift Solenoid On A 4l60e
One very easy way to test your shift solenoids is actually with a simple 9v battery to see if the solenoids are being activated. When using this method you’ll need a 9v battery and a pair of test leads.
When testing your shift solenoids, the first step is to remove the plugs going into the solenoids from the harness. These are simple plugs that have a tab that is easily released. Sometimes these plugs may be stuck, so wiggle them a little to get them free.
Next, take your test leads and connect them to the backside of the solenoid where the electrical prongs are. FYI, since this is a solenoid, it doesn’t matter which wire goes where. After you have attached your test leads, simply connect them to the 9v battery one at a time. If the solenoid works, you’ll hear a clicking sound when you go to attach the 2nd wire to the battery. Simply repeat this process for the other solenoid to verify both are working or not.
Another way to test your shift solenoids is to check the ohms of resistance with a multimeter.
This video does a great job of showing how to easily test 4l60e shift solenoids:
How To Replace A Shift Solenoid On A 4l60e
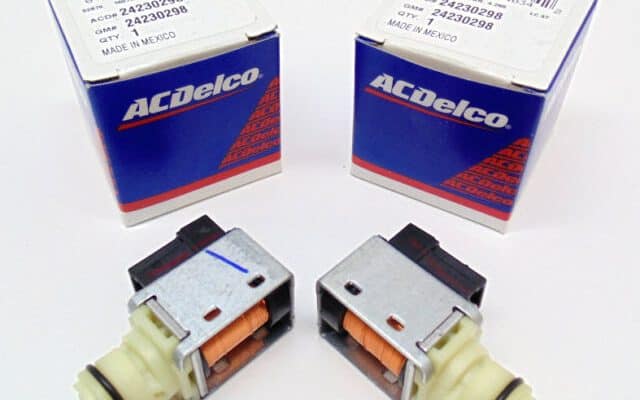
When replacing your 4l60e shift solenoids, it is best to replace them with high quality ACDelco factory replacement components. The procedure for replacing your 4l60e shift solenoids is as follows (if you haven’t started the process yet):
- Drain transmission fluid – Depending on which transmission pan you have, this can be as easy as removing a drain plug, or more difficult (messy) if there is not drain plug.
- (Optional) Remove Transmission Filter – While this isn’t 100% necessary, it gives you more room to work without hitting it.
- Remove Clip Holding Solenoids – With the use of a pick or screw driver, remove the small c shaped clip holding the solenoid into place. Once that is released, you can remove the solenoid.
- Pull Solenoid Out – The solenoids have a rubber o-ring that provides their seal, so simply wiggle and pull on the solenoid to remove it.
- Replace The New Solenoid and Repeat Steps 3 and 4 For The 2nd Solenoid
When replacing your shift solenoids, now would be the perfect time to replace your transmission pan and filter, especially if you haven’t changed your fluid recently, or are wanting a transmission pan with a drain plug for future convivence.


